My next class is the week of June 27 at the John C Campbell Folk School up in Brasstown, NC. I always have a new technique to teach the students and this year I am going to present what I call "Stretched Stars".
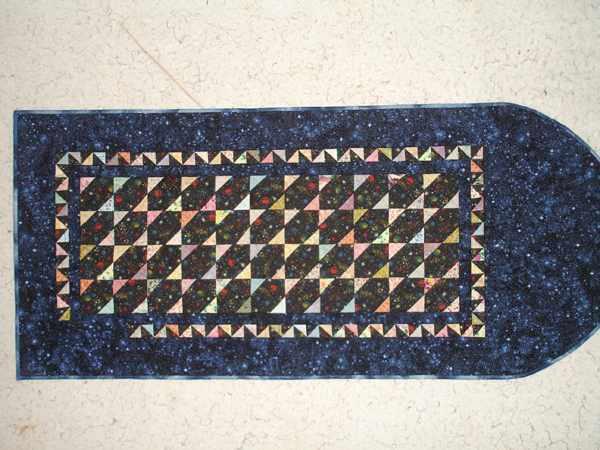
Here you can see a wallhanging made with this process. The background is dark with light stars. I have another piece done with a light background and dark stars, but since it is buried under a pile of larger quilts it missed the photo op.
What I love about this technique is that you simply cut squares...some big, some little......and stitch. The real trick is that there is no waste, which is how the little half square triangles in the border are created.
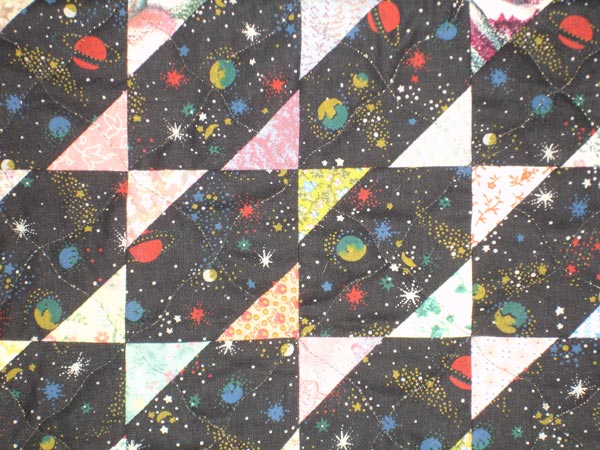
Here is a detail of the Stretched Stars. Focus on one of the dark shapes and then notice the triangles that surround it and you will see the "star".
This is fun and easy and can be made in any size you want. It makes a wonderful baby quilt or lap quilt when you start with small squares. You can sew them into a large bed quilt using larger squares. And those little triangles are a great way to use up small scraps of fabric.
I look forward to seeing all of my students in June! Au revoir, Nancy
May 2010
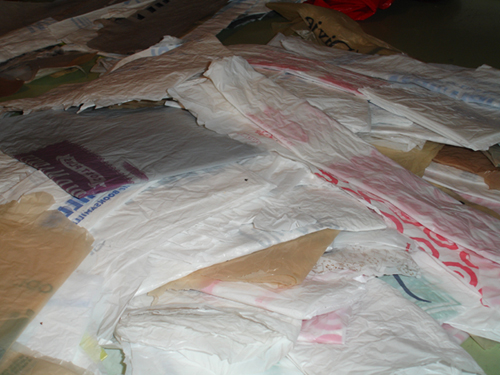
So you might ask yourself....what is that pile of plastic bags doing in her studio?? I have been making great tote bags with them! I recently found a site that gives directions for turning those lightweight bags into a sturdy carryall. If you would like the link to the actual site, please email me.
Basically, you cut the bottom and tops off the bags, then fold them into fourths, so that you have eight layers. You need to make sure any printing is not on the outside of these folds.
You then melt the layers together by gently ironing. It is different with every iron, but I set the heat a bit lower than wool and slowly move the iron over the plastic. You need to protect your iron by placing the folded bag between layers of wax paper. You must to do this in a well ventilated area.
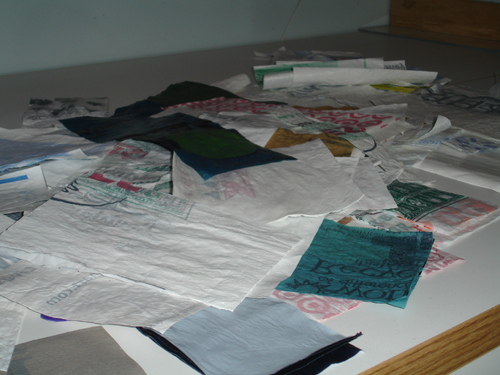
Once they are stiff, I cut the pieces into squares or rectangles. Take these trimmed pieces and stitch them together by overlapping edges and using a zig zag stitch.
You can then build the "fabric" to the specific size you need to make your tote bag. They are real conversation pieces!
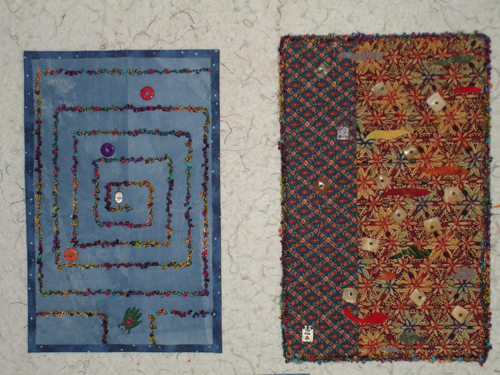
These two pieces are from a challenge that my art quilt group--the FAST women ( Fiber Artists of St Tammany, in case your are wondering!)-gave ourselves for 2009. We had a list of words to work from for inspiration.
The blue piece was based on the word structure. At first I was thinking of a building, but then decided that it was more about how my life is structured right now. The labyrinth conveys where I am heading and the center bead says peace.
Earth was the basis for the piece on the right. Using earth tone fabrics and shell beads, I also incorporated the fused "layers" to give a feeling of what lies within.
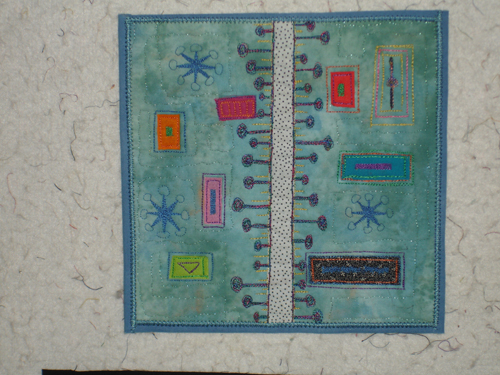
Portal was the word of the month for this small piece. The other pieces are approximately 8"x13", but this one is only about 7" square. I wanted to do some really free form playful quilting on this one. I had originally thought I would do some more realistic doorway, but I kept thinking about the movie that my grandsons love, Monsters, Inc. In the movie there are all of these moving doorways......well, I don't know how to explain it, but if you have seen the movie you know what I mean. I love the whimsical feel of this quiltlet.

As you can probably guess, the word for the piece on the left was fire. I wanted to experiment with stitching the words onto the quilt as well as use a bit of yarn that was calling to me. I wrote the haiku as I contemplated the death of my daughter's childhood friend and how his mother must be aching. The binding is made from some sheer fabric....that was a real challenge!
The piece on the right is based on the word wind. I wanted to give a feeling of the wind actually blowing. Using the same sheer fabric that I used for the binding in Fire, I simply couched in onto the quilt but let it "blow" outside the edges. I did both hand and machine quilting, as well as a couched edging.
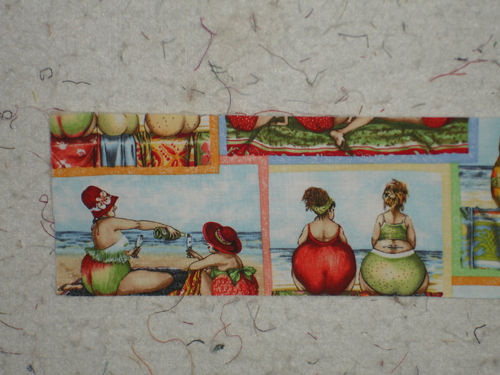
I just had to include a photo of this piece of fabric. My wonderful friends from my quilting class at John C Campbell and I had our second annual retreat in October at the beach on the Outer Banks of North Carolina. On a shopping expedition---yes, we had to go to a quilt shop!--we found this fabric. It seemed to embody the laughter and comraderie of our week---although we didn't even consider putting on bathing suits!!!!!
And in case you are curious, all of these pieces were photographed on the design wall in my studio. It is flannel, so there are bits of thread and fabric stuck all over it. I have thought about trying to clean it, but I kind of like it that way!
Happy 2010 to everyone....nancy
I thought it would be fun to show you what is going on in the studio, with new pictures every couple of months or so. I decided you might like to start with a peek into both of my studio spaces.
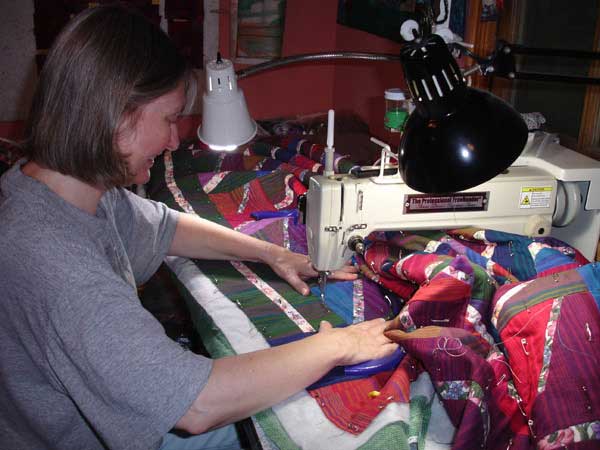
This is my industrial machine "the hulk" which was so big it had to come in through the window. Thank goodness the window was bigger than the door. It is in my downstairs studio---formerly known as the dining/living room.
In this photo, I am quilting a piece that is a variation of my "Hourglass" pattern. And yes, I was actually sewing when Dennis took this picture, not just pretending!
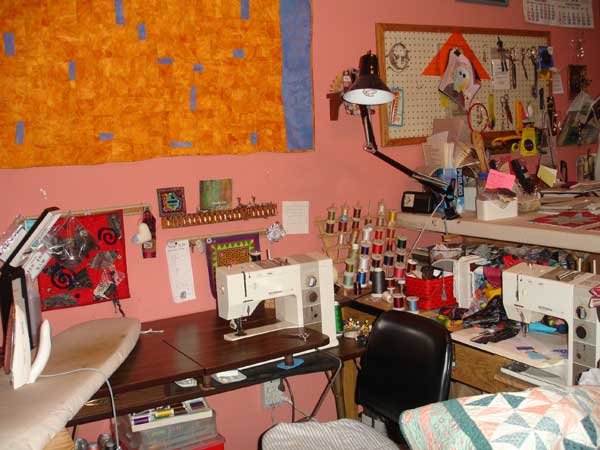
Here are two of my Bernina 930 machines, also in my downstairs studio. I have three 930s which has always been one of my favorite machines. My serger is just out of sight in the bottom right hand corner---covered by a quilt at the time of this photo.
"Birth" is hanging on the wall above my work station. My high cutting table backs up to the machine area.
Don't be fooled by the small thread holder---there's lots more on the floor under the machine!
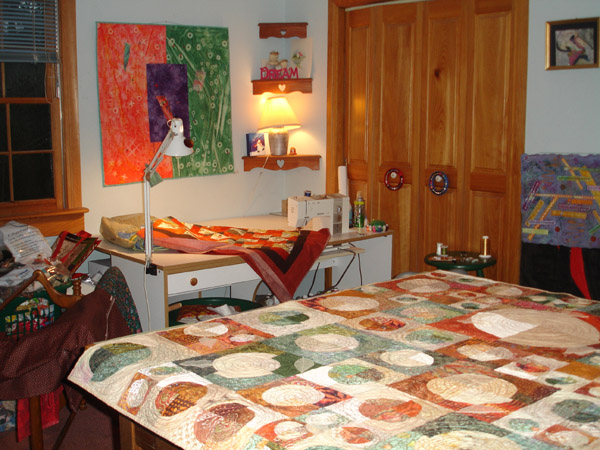
This is my upstairs studio with another Bernina 930. It also has a 10' x 4' maple top cutting surface for pinning, cutting, and layout.
"Leafing the Nest II" is on the large table.
This used to be my son's bedroom. My daughter's old room is used to store my quilts, laid out flat on the beds. It also doubles as the guest room, but then I move all of the quilts.
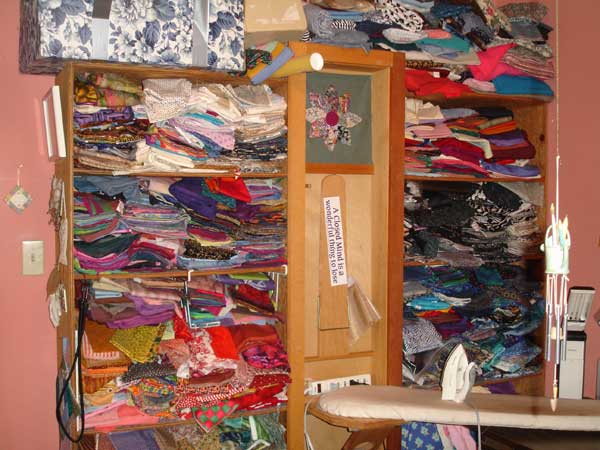
My fabric "stash" is on shelves in the downstairs studio. My husband thinks I have alot of fabric, little does he know.
I love having the wall mounted ironing board. It is right next to my machine for ease of pressing seams while piecing, but can be folded up for more room very simply.
Hope you enjoyed the little studio tour!
Come back soon and see what's new in the studio...... nancy